How to Create Elegant CSS Pricing Tables
When it comes to creating a pricing table for your product or service, your primary goal as a web designer or developer is to make the table clear, intuitive, and visually appealing. This not only enhances the usability of the table but also helps users choose the most suitable pricing plan.
In this article, we will tell you how to create an outstanding CSS3 pricing table with minimal HTML markup and without using images.
Designing a CSS3 Pricing Table
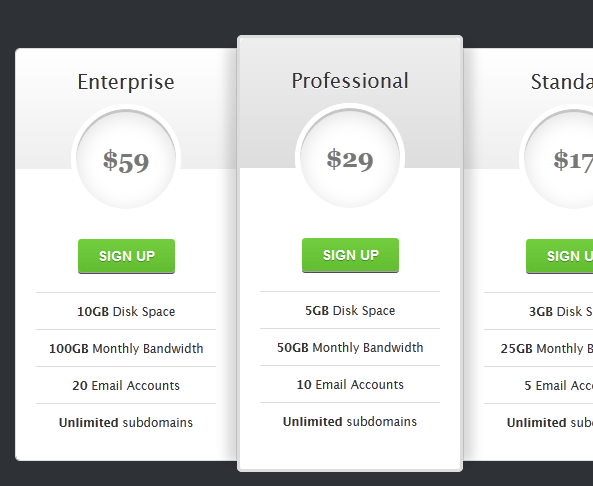
Creating an effective pricing table starts with developing HTML and CSS that make it visually appealing and user-friendly. Here is a snippet of HTML code for the “Enterprise” section of the pricing table:
<div id=”pricing-table” class=”clear”>

    <div class=”plan”>

        <h3>Enterprise<span>$59</span></h3>

        <a class=”signup” href=””>Sign up</a>

        <ul>

            <li><b>10GB</b> Disk Space</li>

            <li><b>100GB</b> Monthly Bandwidth</li>

            <li><b>20</b> Email Accounts</li>

            <li><b>Unlimited</b> Subdomains</li>

        </ul>

    </div>

    <!– Add more plan sections here –>

</div>
The accompanying CSS is designed to maintain simplicity while achieving a clean and modern look for the pricing table. Key CSS elements include setting widths, font styles, backgrounds, and borders.
Noteworthy Features
This CSS3 pricing table has several advantages:
- Minimal HTML code: By leveraging CSS3 capabilities, you can create a stylish pricing table with minimal HTML markup;
- Image-free design: Unlike traditional tables that often rely on images for styling, this design uses CSS3, eliminating the need for images and simplifying maintenance and updates;
- Compatibility: This table gracefully degrades for older browsers, providing a consistent user experience across various platforms.
How to Style Prices in CSS?
Styling prices in CSS is essential to make them stand out and visually appealing on your website. You can style prices using CSS properties such as font properties, color, and positioning. Here’s a step-by-step guide to styling prices in CSS:
- Select the price element: First, identify the HTML element containing the price you want to style. Prices are usually enclosed in HTML elements like <span>, <div>, or are part of heading tags like <h2> or <h3>. You will apply styles to the element that surrounds or contains the price value;
- Use CSS font properties: To style the appearance of the price text, you can use CSS font properties. These properties allow you to control font family, size, weight, and style. For example:
.price {

    font-family: Arial, sans-serif;

    font-size: 24px;

    font-weight: bold;

    font-style: italic;

}
In this example, we’ve selected an element with the class “price” and applied various font properties to change the appearance of the price text.
Setting the color: You can change the price color using the color property. You can use color names, hexadecimal codes, RGB values, or HSL values to specify the color. For example:
.price {

    color: #FF5733; /* Set the price color to a shade of orange */

}- Positioning and alignment: You can adjust the positioning and alignment of the price within its container. To control horizontal alignment, you can use properties like text-align, and for vertical alignment, you can use line-height. For example:
.price {

    text-align: center; /* Center-align the price text */

    line-height: 1.5;   /* Adjust the vertical alignment */

}- Text effects: To add extra visual effects, you can apply text effects like text shadow, text decoration, or letter spacing. Here’s an example of a text shadow effect:
.price {

    text-shadow: 2px 2px 4px rgba(0, 0, 0, 0.2); /* Add a subtle text shadow */

}- Transitions and animations (optional): If you want to add animations or transitions to prices on hover or other events, you can use CSS transitions and animations. They can create attractive effects to draw attention to the price. However, they are optional and depend on your design preferences.
.price:hover {

    transform: scale(1.1); /* Scale the price text on hover */

    transition: transform 0.3s ease; /* Add a smooth transition effect */

}
Don’t forget to customize the CSS selector (e.g., .price) and class name to match the actual HTML structure of your price elements. This allows you to target and style specific prices on your website.
Conclusion
This CSS3 pricing table design follows best practices in web design, such as highlighting the recommended plan, emphasizing prices, and presenting plans in a logical descending order. By applying these principles, you can create an effective pricing table that not only looks great but also helps users make informed decisions.
We hope this tutorial is helpful to you, and we invite you to share your feedback and thoughts on this design.