A Deep Dive Into Layer Management and Selection in Procreate
Procreate, an ingenious application for digital art on the iPad, has established itself as a fundamental tool in the art and design sphere. It stands out due to its extensive range of features, user-friendly interface, and portability. One notable aspect that has garnered significant attention is its layer management functionality, which offers artists a wealth of non-destructive editing options. Nonetheless, the process of selecting and manipulating multiple layers simultaneously is not as simple as it appears at first glance. In this comprehensive article, we will delve into the intricacies of layer management and selection within Procreate, leaving no detail unexplored.
Layers in Procreate: An Elaborate Understanding
Before delving into the process of selecting all layers in Procreate, it is essential to understand the concept, importance, and functionality of layers within the application.
In Procreate, layers function similarly to transparent sheets that are stacked on top of each other. Each layer can hold distinct elements of your artwork, and modifications made to one layer do not impact the others. This feature enables non-destructive editing, allowing you to make changes without permanently altering the entire composition. Moreover, layers offer additional capabilities such as blending modes and special effects, providing advanced options for artistic manipulation. To better grasp the significance of layers in Procreate, refer to the comprehensive table below:
Table 1: Deep-Diving into the Significance of Layers in Procreate
| Importance | Detailed Explanation |
|---|---|
| Non-Destructive Editing | With layers, artists have the freedom to make alterations to specific parts of the artwork without affecting other parts. Layers enable the isolation of different sections of the artwork, thereby ensuring that any changes made are localized and do not interfere with the overall image. |
| Element Separation | By allocating different elements of the artwork to different layers, the organization becomes easier and any subsequent editing becomes less tedious. For instance, an artist might decide to dedicate one layer for line work, another for colors, and yet another for text, thereby clearly delineating each aspect of the artwork. |
| Special Effects and Blending Modes | Layers are essential when artists wish to experiment with different blending modes and special effects. Since blending modes in Procreate define how layers interact with each other, having distinct layers allows for the creation of various special effects that can enhance the artwork. |
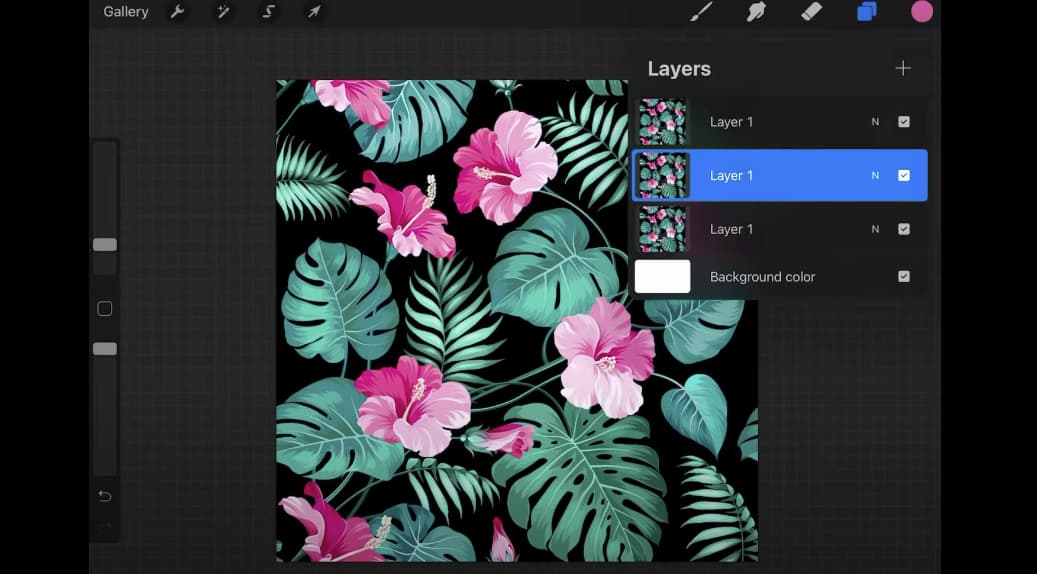
How to Manipulate All Layers in Procreate: Step-by-Step Guides
As of my knowledge cutoff in September 2021, Procreate does not have a direct ‘Select All Layers’ feature. However, there are two main ways in which you can manage and manipulate all layers collectively – merging and grouping.
Method 1: Merging All Layers
Merging layers is a simple and convenient process in Procreate that allows you to combine all your individual layers into a single layer. This technique can be especially helpful when you want to finalize your artwork or when you need to reduce the number of layers to avoid clutter or manage memory usage more efficiently. Here is a detailed step-by-step guide:
- Accessing the Layers Panel:
- Start by opening your artwork in Procreate;
- Look for the layers icon located at the top right corner of the screen. It looks like two overlapping squares;
- Tap on the layers icon to open the Layers Panel. This panel displays all the layers present in your artwork.
- Selecting the Top Layer:
- Once you have the Layers Panel open, you need to select the top layer;
- Scroll through the layers list and locate the topmost layer;
- Tap on the top layer to select it.
- Copying All Layers:
- After selecting the top layer, perform a swipe downwards on the screen using three fingers simultaneously;
- This action will bring up the ‘Copy & Paste’ menu;
- In the ‘Copy & Paste’ menu, you will find various options. Choose the ‘Copy All’ option from the list.
- Pasting to Create a Merged Layer:
- Perform another swipe downwards on the screen using three fingers to reopen the ‘Copy & Paste’ menu;
- From the menu, select the ‘Paste’ option;
- Procreate will then create a new layer that combines all your previous layers, resulting in a merged layer.
By following these steps, you can effectively merge all your layers into a single layer in Procreate. This process can help streamline your workflow, simplify your artwork, and optimize memory usage.
Table 2: Pros and Cons of Merging All Layers
| Pros | Cons |
|---|---|
| Simplifies the artwork by reducing the number of layers | Once merged, layers can’t be separated again. This operation can limit your editing options in the future |
| Provides the ability to apply modifications to the entire artwork simultaneously | The merging operation can’t be undone unless you immediately tap the “Undo” button |
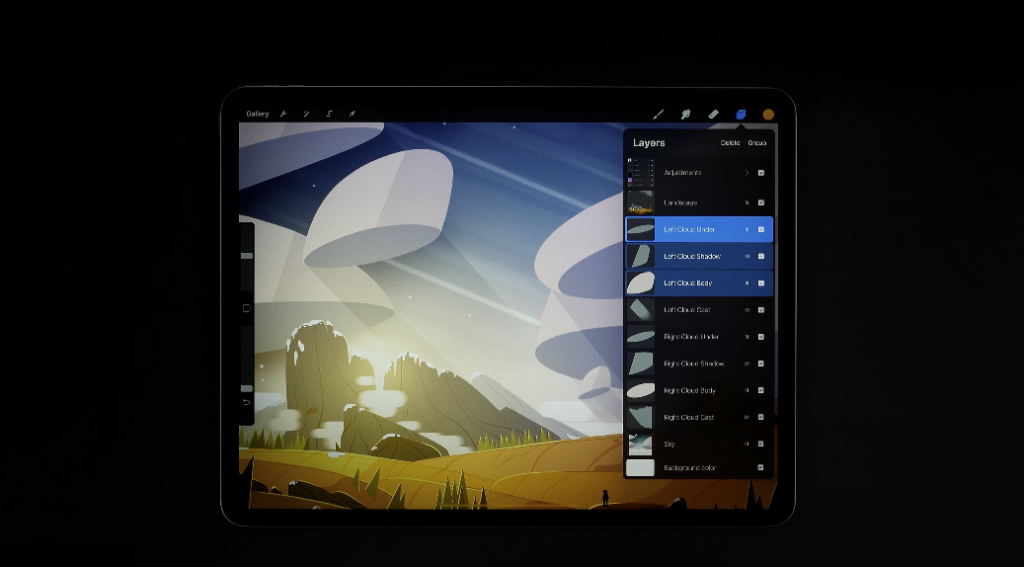
Method 2: Grouping Layers
Grouping layers in Procreate is an effective way to organize your artwork and manage multiple layers simultaneously. By grouping layers, you can easily move, transform, or edit them together while preserving their individual characteristics. This method is particularly useful for complex artworks that involve a large number of layers. Here are the detailed steps to group layers in Procreate:
- Accessing the Layers Panel:
- To begin, open your artwork in Procreate;
- Tap on the layers icon located at the top right corner of the screen. This icon resembles two overlapping squares;
- By tapping the layers icon, the Layers Panel will open, displaying all the layers in your artwork.
- Grouping Two Layers:
- In the Layers Panel, swipe left on any layer you want to group. This action will reveal additional options for that layer, such as “Lock,” “Duplicate,” and “Delete”;
- Instead of choosing these options, click and hold the layer you want to group and drag it onto another layer.
- Creating a New Group:
- As you drag the layer onto another layer, a new group will automatically be created, containing these two layers;
- The group will appear as a folder icon in the Layers Panel, with the grouped layers nested inside it.
- Adding More Layers to the Group:
- To add additional layers to the existing group, simply repeat the dragging process;
- Click and hold the layer you want to add, then drag it onto the existing group in the Layers Panel;
- The layer will be added to the group, and you can continue to add more layers in the same way.
By following these steps, you can easily group layers in Procreate, allowing for efficient management and editing of multiple layers at once. Grouping layers is a valuable technique for maintaining an organized workspace and simplifying the handling of complex artworks with numerous layers.
The table below provides an in-depth understanding of the advantages and disadvantages of grouping layers.
Table 3: Advantages and Disadvantages of Grouping Layers
| Advantages | Disadvantages |
|---|---|
| Layers within a group can be transformed or moved simultaneously | Modifications to color, brightness, or contrast cannot be applied to the entire group at once. They need to be applied individually to each layer |
| Grouping allows for better organization, especially in complex artworks with numerous layers | Layer effects or blending modes cannot be applied to a group as a whole. They need to be applied to individual layers within the group |
Conclusion
Procreate’s layer management system enables non-destructive editing and advanced features for artists. While there is no direct “Select All Layers” feature, merging and grouping methods allow for collective manipulation. Merging simplifies artwork but limits future editing, while grouping maintains individual characteristics for simultaneous transformation and editing. Each method has pros and cons, providing flexibility in organizing complex artworks. With a solid understanding of layer management in Procreate, artists can unleash their creativity and elevate their digital art.
FAQS
Yes, you can. To ungroup layers, swipe left on the group in the layers panel and tap “Ungroup.” This will separate all layers in the group, reverting them back to their original, ungrouped state.
Yes. Before merging layers, duplicate all layers you wish to keep. You can then merge the original layers, keeping the duplicates intact for future use. To duplicate a layer, swipe left on the layer in the layers panel and select “Duplicate”.
Yes, layers within a group can be rearranged. Tap, hold, and drag the layer within the group to its desired location.
To change the canvas size in Procreate, follow these steps:
1. Tap on the wrench icon in the top toolbar to open the Actions menu.
2. Select “Canvas” from the menu options.
3. In the Canvas panel, you can adjust the size of your canvas by manually entering specific dimensions or selecting a pre-defined preset from the list.
4. Once you have set the desired canvas size, tap “Done” to apply the changes.
Yes, Procreate allows you to export your artwork in various file formats. Here’s how:
1. With your artwork open, tap on the wrench icon in the top toolbar to access the Actions menu.
2. Choose the “Share” option from the menu.
3. In the Share panel, you will see a range of export options. Select the format you want to export your artwork in, such as JPEG, PNG, PSD, or TIFF.
4. Adjust any additional export settings if needed, such as resolution or file quality.
5. Finally, tap “Share” or “Save Image” to export your artwork in the selected format.