
Comprehensive Guide to Cutting Out Shapes in Adobe Illustrator
Adobe Illustrator is a professional design tool that allows graphic artists to create intricate designs with precision and flexibility. One common and practical feature is the ability to cut one shape out from another. This comprehensive guide will explain in detail the steps to achieve this in Adobe Illustrator.
Exploring Adobe Illustrator’s Tools and Features
Adobe Illustrator is a versatile vector graphics software that offers a wide range of tools for creating detailed and complex designs. An essential tool for this process is the Pathfinder Panel, which provides functions for combining, dividing, or subtracting shapes.
Pathfinder Panel: A Closer Look
Pathfinder is one of Illustrator’s most powerful tools, allowing designers to create complex shapes by uniting, dividing, intersecting, excluding, or subtracting simpler shapes. Here’s a breakdown of the Pathfinder panel options:
| Button | Function | Description |
|---|---|---|
| Unite | Combine | Merges all selected shapes into a single one |
| Minus Front | Subtract | Removes the top-most shape from the one(s) beneath it |
| Intersect | Intersect | Leaves only the area where all selected shapes overlap |
| Exclude | Difference | Deletes the overlapping areas of the selected shapes |
| Divide | Split | Separates the selected shapes into distinct parts at their intersection points |
Step-By-Step Guide: Cutting Out One Shape from Another
The process of cutting out one shape from another in Illustrator involves creating your shapes, selecting them, and using the Pathfinder panel. Here’s a step-by-step guide:
Step 1: Creating Your Shapes
Open Adobe Illustrator and create a new document.
Choose your preferred shape tool from the toolbar (Rectangle Tool, Ellipse Tool, etc.).
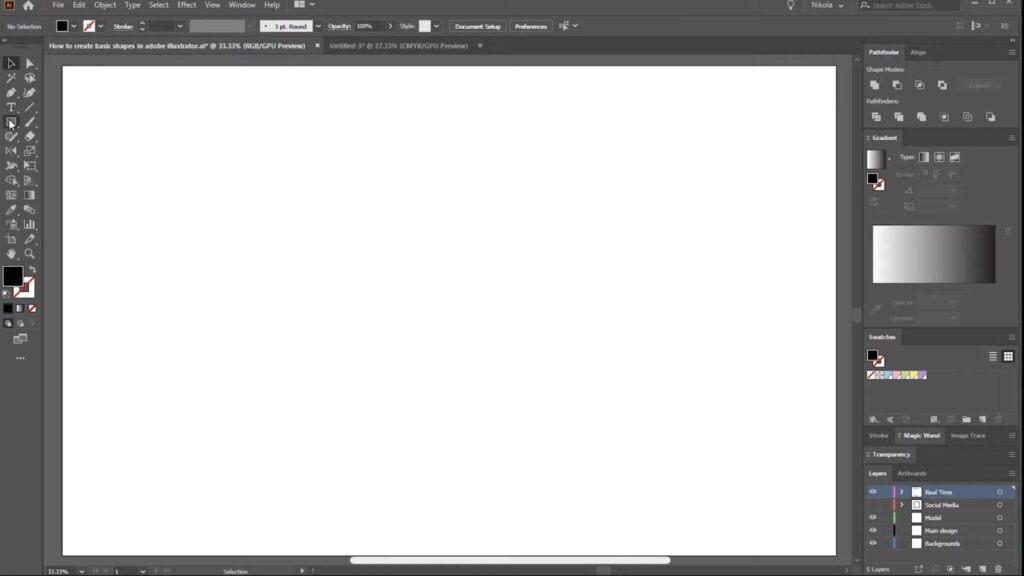
Click and drag on your artboard to draw your first shape.
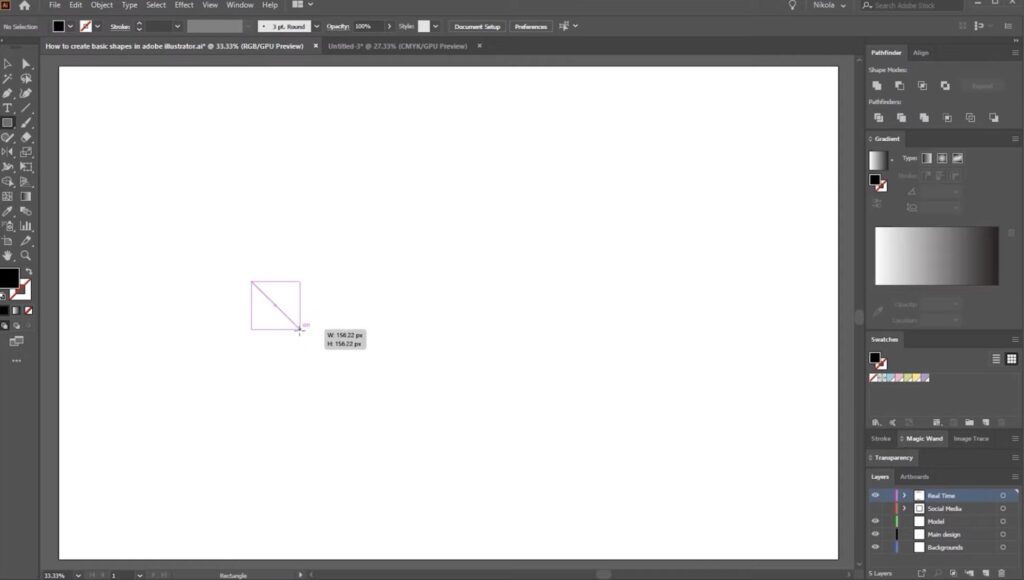
Repeat the process to create the second shape, which should overlap the first one.
Step 2: Selecting Your Shapes
- Choose the Selection Tool from the toolbar (or press ‘V’ on your keyboard);
- Click and drag a selection box over both shapes to select them simultaneously.
Step 3: Cutting Out the Shapes
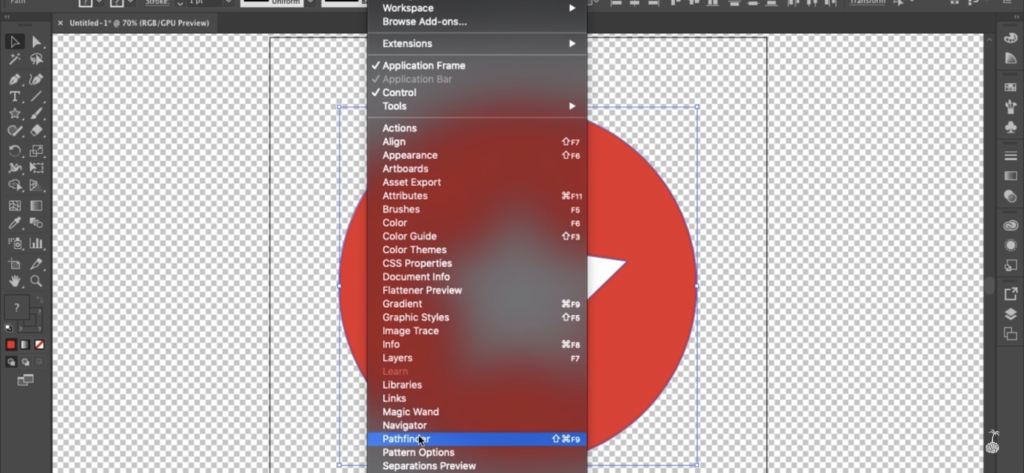
Open the Pathfinder panel by going to Window > Pathfinder or using the shortcut Shift + Ctrl/Command + F9.
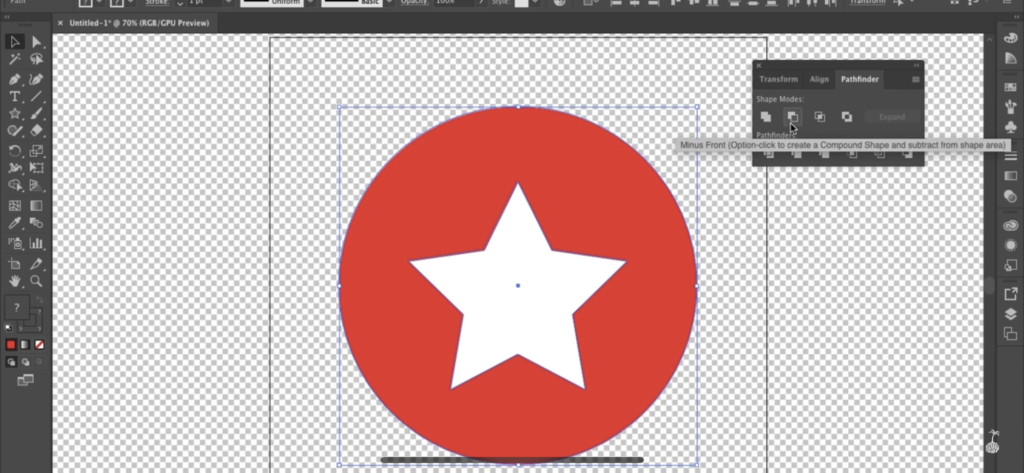
With both shapes selected, click on the ‘Minus Front’ button in the Pathfinder panel. The top shape will cut out from the bottom shape, leaving a hole in the shape of the top object.
The ability to cut out one shape from another provides a powerful tool for creating diverse designs. However, you may occasionally encounter some issues. Here are solutions to some common problems:
Troubleshooting Common Issues
| Problem | Solution |
|---|---|
| The ‘Minus Front’ function doesn’t work. | Make sure that the shape you want to subtract is at the front. You can adjust the order of the shapes by selecting the shape and choosing Object > Arrange. |
| The Pathfinder function doesn’t yield the expected results. | Try ungrouping any grouped shapes before using the Pathfinder function. Also, convert any text or strokes to outlines (Object > Expand or Type > Create Outlines) to ensure Pathfinder works properly. |
| The cut-out shape isn’t visible. | Check the fill color of your shapes. The cut-out area shouldn’t have the same color as the remaining shape. |
Taking Your Illustrator Skills to the Next Level
Mastering Adobe Illustrator involves more than understanding how to cut shapes. Here are additional tips and tricks to help you get the most out of this software:
Exploring the Shape Builder Tool
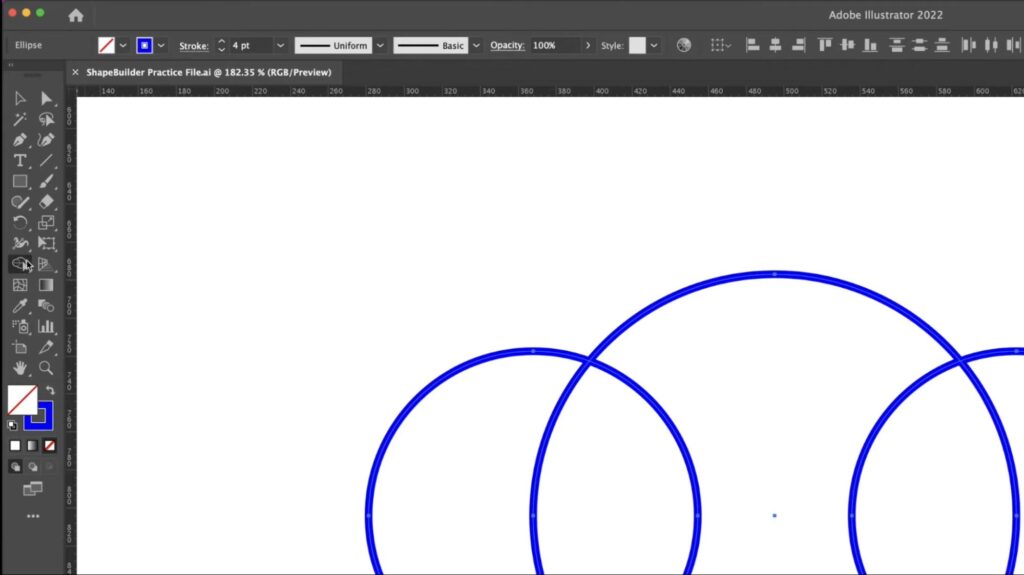
The Shape Builder Tool (Shift + M) is a powerful feature in design software that allows users to create complex shapes by merging, deleting, and creating shapes based on overlaps between other shapes. This tool offers a variety of functions and capabilities that streamline the shape creation process. In this detailed explanation, we will explore the different aspects of the Shape Builder Tool, highlighting its features and how to use them effectively.
Accessing the Shape Builder Tool
To access the Shape Builder Tool, follow these steps:
- Open your design software;
- Select the desired artwork or shapes that you want to work with;
- Press the “Shift” key and then press the “M” key. Alternatively, you can locate the Shape Builder Tool icon in the toolbar and click on it.
Merging Shapes
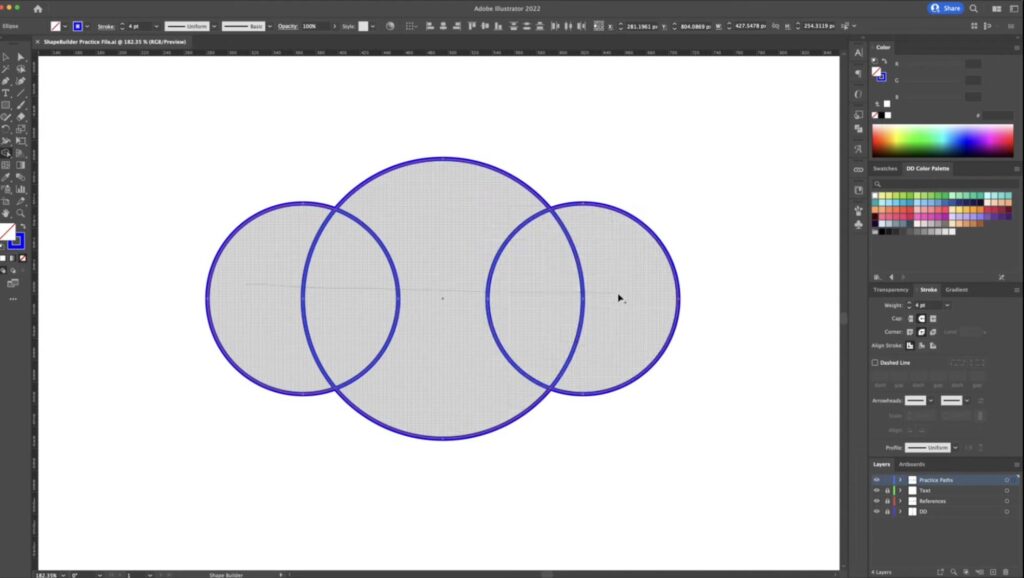
The Shape Builder Tool allows you to merge shapes together, creating a single unified shape. Here’s how to merge shapes:
1. Select the Shape Builder Tool.
2. Click and drag across the shapes you want to merge.
3. Release the mouse button.
4. The selected shapes will merge together, forming a new shape based on their overlapping areas.
Deleting Shapes
The Shape Builder Tool also enables you to delete unwanted shapes from your artwork. Follow these steps to delete shapes:
- Select the Shape Builder Tool;
- Click and drag across the shapes you want to delete;
- Release the mouse button;
- The selected shapes will be deleted from your artwork, leaving only the remaining shapes intact.
Creating Shapes
In addition to merging and deleting shapes, the Shape Builder Tool allows you to create new shapes based on overlaps. Here’s how to create shapes:
1. Select the Shape Builder Tool.

2. Click and drag across the areas where you want to create a new shape.

3. Release the mouse button.
4. A new shape will be created, encompassing the overlapping areas.
Additional Tips and Tricks
Here are some additional tips and tricks for using the Shape Builder Tool:
- Holding down the “Alt” key (Option key on Mac) while clicking on a shape allows you to delete specific areas within a shape without affecting the overall shape;
- To undo a recent action, press “Ctrl + Z” (Command + Z on Mac);
- To redo an action that was undone, press “Ctrl + Shift + Z” (Command + Shift + Z on Mac);
- Experiment with different shapes and overlapping areas to create unique and intricate designs;
- Remember to save your work regularly to avoid losing any changes.
Harnessing the Power of Layers
Layers are a powerful organizational tool in design software like Adobe Illustrator. They allow you to efficiently manage complex designs by separating different parts of your artwork, controlling visibility, and determining the stacking order of elements. In this detailed guide, we will explore the various features and functionalities of layers and how to effectively harness their power in your design workflow.
Understanding Layers
Layers in Illustrator are like transparent sheets stacked on top of each other, with each sheet containing specific elements of your design. They provide a hierarchical structure that allows you to organize and work with different components separately while maintaining overall cohesion. Layers can contain various objects such as shapes, text, images, and more.
Accessing the Layers Panel
To access the Layers panel in Illustrator, follow these steps:
- Launch Adobe Illustrator and open your design file;
- Go to the “Window” menu at the top;
- Select “Layers” from the dropdown menu;
- The Layers panel will appear, showing a list of layers in your document.
Creating and Managing Layers
Creating and managing layers effectively is crucial for organizing your design. Here’s how you can create and manage layers in Illustrator:
| Action | Description |
|---|---|
| Creating a New Layer | In the Layers panel, click on the “New Layer” button at the bottom. |
| A new layer will be added to the list with a default name (e.g., Layer 1). | |
| Rename the layer by double-clicking on its name and entering a descriptive name that reflects its content. | |
| Reordering Layers | To change the order of layers, click and drag a layer up or down in the Layers panel. |
| The stacking order determines which layer appears in front or behind others. | |
| Grouping Layers | Select the layers you want to group by holding the “Shift” key and clicking on each layer. |
| Right-click on the selected layers and choose “Group” from the context menu. | |
| The grouped layers will be nested under a new layer group, providing a more organized structure. | |
| Hiding and Showing Layers | To hide a layer, click on the eye icon next to the layer in the Layers panel. |
| The eye icon will turn off, indicating that the layer is hidden. | |
| To show a hidden layer, click on the empty space next to the eye icon. | |
| The eye icon will reappear, indicating that the layer is visible. | |
| Locking Layers | To prevent accidental modifications to a layer, click on the lock icon next to the layer in the Layers panel. |
| The lock icon will appear, indicating that the layer is locked. | |
| To unlock a locked layer, click on the empty space next to the lock icon. | |
| The lock icon will disappear, indicating that the layer is unlocked. |
Benefits of Using Layers
Using layers in Illustrator offers several benefits for managing complex designs:
- Organization: Layers provide a structured way to organize different design elements, making it easier to navigate and edit specific parts of your artwork;
- Isolation: Working on separate layers allows you to focus on individual components without affecting other parts of your design;
- Visibility Control: Layers enable you to hide or show specific elements, providing a clearer view of your design during the editing process;
- Editing Efficiency: By isolating elements on different layers, you can make changes or adjustments more efficiently, avoiding unintended modifications to unrelated parts;
- Flexibility: Layers offer the flexibility to rearrange, group, and reorder elements, allowing for quick experimentation and design iteration.
Leveraging Keyboard Shortcuts
Mastering keyboard shortcuts can greatly enhance your speed and efficiency when working in Adobe Illustrator. By using the appropriate shortcuts, you can quickly access essential tools and functionalities without having to navigate through menus or search for options. In this guide, we will explore some common keyboard shortcuts in Illustrator and how they can be leveraged to streamline your design workflow.
Selection Tool
The Selection Tool (V) is one of the most frequently used tools in Illustrator. It allows you to select and manipulate objects within your artwork. Press the “V” key to activate the Selection Tool instantly. You can then click and drag to select objects, move them, or perform other transformations.
Pen Tool
The Pen Tool (P) is a versatile tool for creating precise and custom paths in Illustrator. Press the “P” key to activate the Pen Tool. With this tool, you can click to create anchor points and adjust the path curves to create smooth lines or complex shapes.
Brush Tool
The Brush Tool (B) is used for applying artistic strokes and effects to your artwork. Press the “B” key to activate the Brush Tool. With this tool selected, you can click and drag to draw freehand strokes with varying thickness and styles.
Zoom Tool
The Zoom Tool (Z) allows you to zoom in and out of your artwork to work on intricate details or get an overview of the entire composition. Press the “Z” key to activate the Zoom Tool. You can then click to zoom in or hold the “Alt” key (Option key on Mac) and click to zoom out.
Artboard Tool
The Artboard Tool (Shift + O) is used to modify and rearrange artboards in Illustrator. Press “Shift + O” simultaneously to activate the Artboard Tool. With this tool selected, you can click on an existing artboard to select it and adjust its size or position.
Additional Keyboard Shortcuts
Here are a few more useful keyboard shortcuts in Illustrator:
| Shortcut | Description |
|---|---|
| Ctrl + Z (Command + Z on Mac) | Undo the most recent action. |
| Ctrl + Shift + Z (Command + Shift + Z on Mac) | Redo an action that was undone. |
| Ctrl + C (Command + C on Mac) | Copy the selected objects or artwork. |
| Ctrl + V (Command + V on Mac) | Paste the copied objects or artwork. |
| Ctrl + X (Command + X on Mac) | Cut the selected objects or artwork. |
| Ctrl + G (Command + G on Mac) | Group selected objects into a single group. |
| Ctrl + Shift + G (Command + Shift + G on Mac) | Ungroup objects within a group. |
| Ctrl + D (Command + D on Mac) | Duplicate the selected objects. |
| Ctrl + ; (Command + ; on Mac) | Show or hide guides. |
Customizing Keyboard Shortcuts
If you prefer different keyboard shortcuts or want to assign shortcuts to specific commands, Illustrator allows you to customize keyboard shortcuts to suit your workflow. You can access the Keyboard Shortcuts menu by going to the “Edit” menu, selecting “Keyboard Shortcuts,” and then adjusting the settings according to your preferences.
Advancing with Advanced Tools
In addition to the essential tools in Adobe Illustrator, there are advanced tools available that can elevate your designs to the next level. These tools offer unique functionalities and creative possibilities. In this guide, we will explore two such advanced tools: the Gradient Mesh Tool and the Blend Tool. Learn how to utilize these tools effectively and unlock new dimensions in your design process.
Gradient Mesh Tool
The Gradient Mesh Tool in Illustrator allows you to create intricate and realistic gradient effects on objects, giving depth and dimension to your artwork. Follow these steps to use the Gradient Mesh Tool:
- Select an object or shape that you want to apply the gradient effect to;
- Activate the Gradient Mesh Tool by clicking on its icon in the Tools panel;
- Click on the desired area of the object to add a mesh point;
- Continue adding mesh points to define the areas where you want the gradient to transition;
- Select the Mesh Selection Tool (U) to move, adjust, or delete mesh points;
- Use the Gradient panel to customize the colors and properties of the gradient.
The Gradient Mesh Tool offers precise control over color transitions, allowing you to create stunning illustrations, lifelike textures, and realistic shading effects.
Blend Tool
The Blend Tool in Illustrator enables you to create smooth transitions and blends between two or more objects. It’s a powerful tool for creating complex shapes, patterns, and dynamic visual effects. Here’s how to use the Blend Tool:
- Select two or more objects that you want to blend together;
- Activate the Blend Tool by clicking on its icon in the Tools panel;
- Click on the first object to set it as the starting point of the blend;
- Click on the second object to set it as the ending point of the blend;
- Illustrator will create a series of intermediate objects and colors, seamlessly blending between the starting and ending shapes.
You can further customize the blend by adjusting settings in the Blend Options dialog box, which appears after creating the blend.
The Blend Tool offers endless possibilities for creating smooth transitions, morphing shapes, and generating dynamic artwork, allowing you to explore innovative design concepts and visual storytelling.
Experiment and Combine
Both the Gradient Mesh Tool and the Blend Tool provide immense creative potential on their own. However, you can also combine them with other Illustrator features and techniques to unlock even more possibilities. For example, you can blend multiple objects with gradient mesh effects, resulting in complex and captivating visual effects.
Learning Resources
To further enhance your understanding and proficiency with these advanced tools, consider exploring online tutorials, video courses, and official documentation provided by Adobe. These resources offer step-by-step instructions, tips, and techniques that can help you master the Gradient Mesh Tool, Blend Tool, and other advanced features in Illustrator.
Conclusion
The ability to cut out shapes in Adobe Illustrator is a fundamental skill that can help elevate your designs. By understanding and mastering the Pathfinder panel and other tools, you can create intricate designs with relative ease. Happy designing!