
The Ultimate Tutorial on How to Rotate in Photopea
Photopea’s robust capabilities position it as an impressive free substitute for Photoshop, offering a remarkably similar range of features.
The process of rotation in Photopea can be broken down into two primary segments: the rotation of a single layer and the rotation of the entire canvas.
Rotating a Single Layer
| Step | Description |
|---|---|
| Access Transform Controls | Open Photopea> Navigate to the top menu> Locate the “Transform controls” toggle checkbox and activate it. |
| Select the Layer to Rotate | In the canvas or layers panel, directly click on the layer you wish to rotate. |
| Using Menu Options | Alternatively, go to the Edit tab in the main menu > Choose “Transform” and then select “Rotate.” |
| Keyboard Shortcut Option | For a quicker method, use the keyboard shortcut (Ctrl + Alt + T). |
| Activate Free Transform Tool | When the rotation action is triggered, a bounding black box will appear around the selected item. |
| Identify Rotation Arrows | Position your cursor towards the middle of a side or corner > The cursor will seamlessly morph into rotation arrows. |
| Perform Rotation | Rotate the selected object by dragging the rotation arrows > Adjust the angle as needed. |
| Secure Object’s Placement | Click away from the object to finalize its rotation. |
| Proportional Resizing | If required, Photopea enables proportional resizing of the object while maintaining its shape. |
Once you’re acquainted with the menu options or keyboard shortcuts, performing individual layer rotations becomes incredibly easy.
Photopea simplifies this process with its user-friendly design, incorporating a toggle checkbox labeled “Transform controls” within the top menu interface. Enabling this option allows you to effortlessly pick the specific layer you intend to rotate by directly clicking on it either on the canvas or within the layers panel.
Alternatively, you can opt to head to the Edit section in the main menu. From there, access Transform, then Rotate, or you can take advantage of the keyboard shortcut (Ctrl + Alt + T) based on your preference.
Activating this initiates the free transform tool, identifiable by the emergence of a bounding black box around your chosen element, whether it’s an image or a drawing. As you move your cursor towards the midpoint of a side or corner, it seamlessly transforms into rotation arrows.
Execute the rotation as needed, and then simply click elsewhere to lock the object’s placement. Importantly, Photopea empowers you to resize the object proportionally if the need arises.
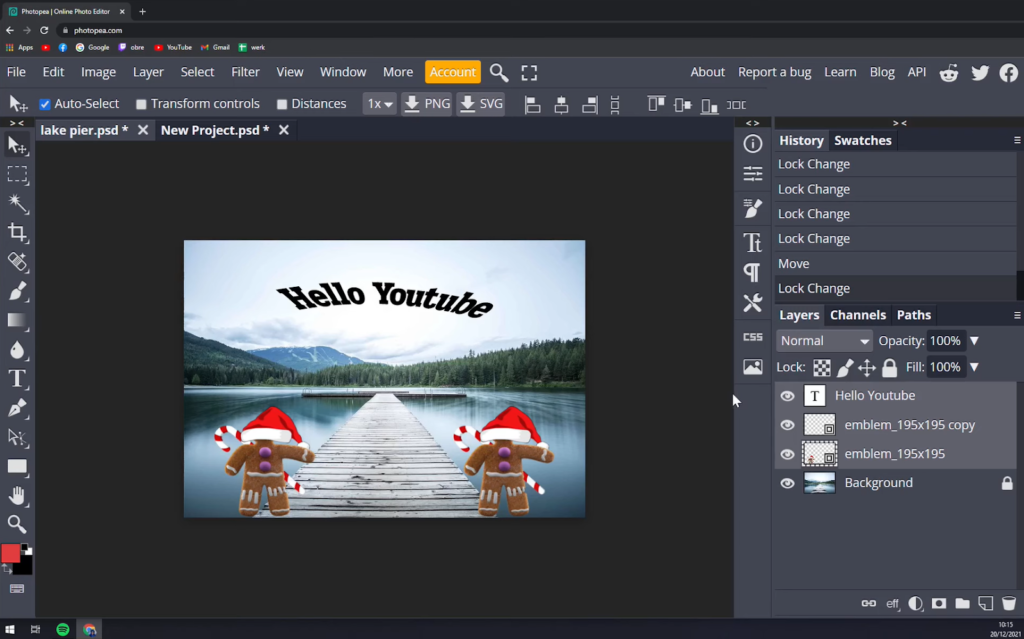
Rotating Multiple Layers Simultaneously
| Step | Description |
|---|---|
| Ensure Layer Visibility | Click the eye icon in the layers menu to make the desired layer visible. |
| Select the Entire Canvas | Utilize the Move tool (shortcut: V) to zoom out and encompass the entire canvas. |
| Select All Visible Elements | This action automatically selects all currently visible layers and elements. |
| Collective Rotation | While holding down the (Shift) key, click on objects within layers. Achieve collective rotation for selected items. |
For those seeking to rotate multiple layers simultaneously, the process remains just as straightforward. Ensure the desired layer is visible by clicking the eye icon in the layers menu. Utilize the Move tool (shortcut: V) to zoom out and select the entire canvas. This action results in the selection of all currently visible elements.
Moreover, you can directly click on objects within layers while holding down the (Shift) key to achieve a collective rotation effect.
Flexible Rotation Methods
- You can choose between using the keyboard shortcut (Ctrl + Alt + T) or activating the Transformation controls checkbox;
- Photopea offers flexibility and efficiency in the layer rotation process.
Whether you prefer the keyboard shortcut (Ctrl + Alt + T) or the Transformation controls checkbox, Photopea affords you a flexible and efficient approach to layer rotation.
Enhancing Your Rotation Skills
When it comes to achieving seamless rotations, employing smart techniques can significantly elevate your design game. One such tip involves holding down the (Shift) key while rotating, allowing you to make adjustments in precise 15-degree increments. This is particularly useful for achieving meticulous angles when the need arises.
In the process of refining your rotations, you’ll encounter a small square positioned at the center of the bounding box. This square serves as the pivotal rotation axis, determining the point around which your object pivots. To manipulate the rotation point, simply move this box to the desired location. Should you wish to return it to the central position, you can achieve this effortlessly by bringing it in close proximity, triggering a seamless snap back into place. These subtle yet powerful techniques can make a world of difference in your rotation endeavors.
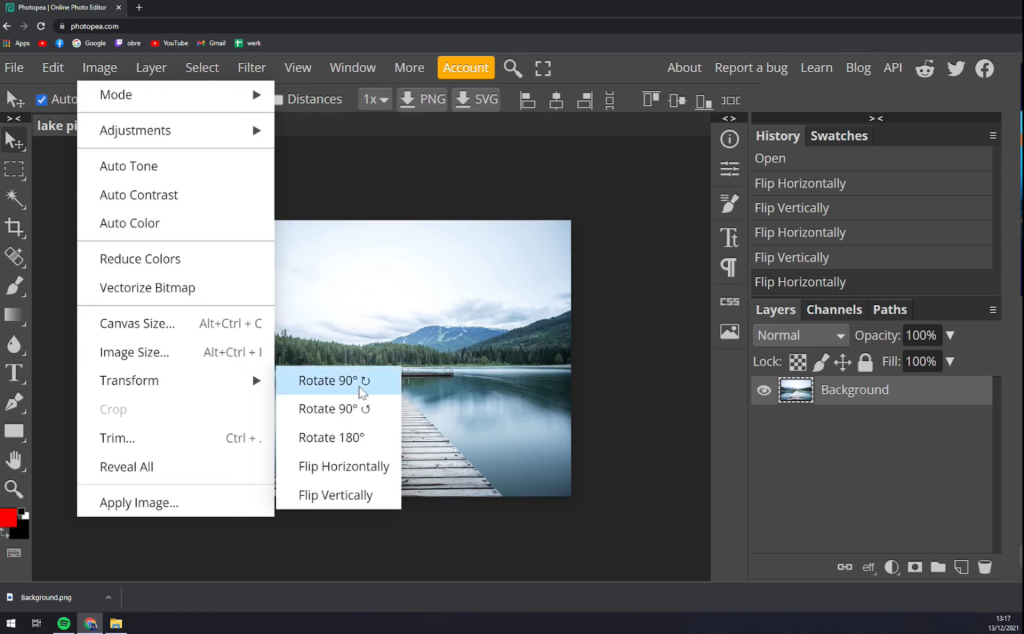
Rotating a Canvas
Effortlessly Rotating the canvas is a simple task that involves just a single step. Head to the Image tab located in the upper menu and hover over the Transform option. Doing so will reveal a secondary menu presenting you with various choices to rotate the canvas: a 90-degree clockwise rotation, a 90-degree counterclockwise rotation, a 180-degree flip, horizontal flipping, or vertical flipping.
Conclusion
And there you go, a comprehensive and easy-to-follow tutorial on canvas rotation in Photopea.
Feel free to drop your comments below if you have any inquiries or if you’d like us to explore different subjects in our guides. Thank you for your time and consideration!