Importing Photos into Photoshop: A Step-by-Step Guide
Importing photos into Photoshop opens up a world of creative possibilities. Whether you’re working on a computer or a mobile device, this guide will walk you through the various methods of importing images. From simple computer imports to utilizing Adobe Photoshop Mix on your mobile device, you’ll gain valuable insights on seamlessly incorporating photos into your projects.
Discover the versatility of the program and unleash your creativity with our step-by-step instructions.
Mastering Single Image Import into Photoshop
Importing images into Photoshop is a seamless process that offers a myriad of creative possibilities. Whether you prefer a drag-and-drop approach or importing from image databases like Lightroom, rest assured that your photos will retain their highest quality.
However, ensuring sharpness goes beyond the import process alone. In this guide, we will explore multiple methods to import images into Photoshop, providing insights on checking image data during import.
For PC & Mac
Importing images into Photoshop on both PC and Mac follows a similar pattern, with minor differences in interface and keyboard shortcuts. Let’s delve into a detailed explanation for both platforms:
On a PC:
- Launch Ps on your computer;
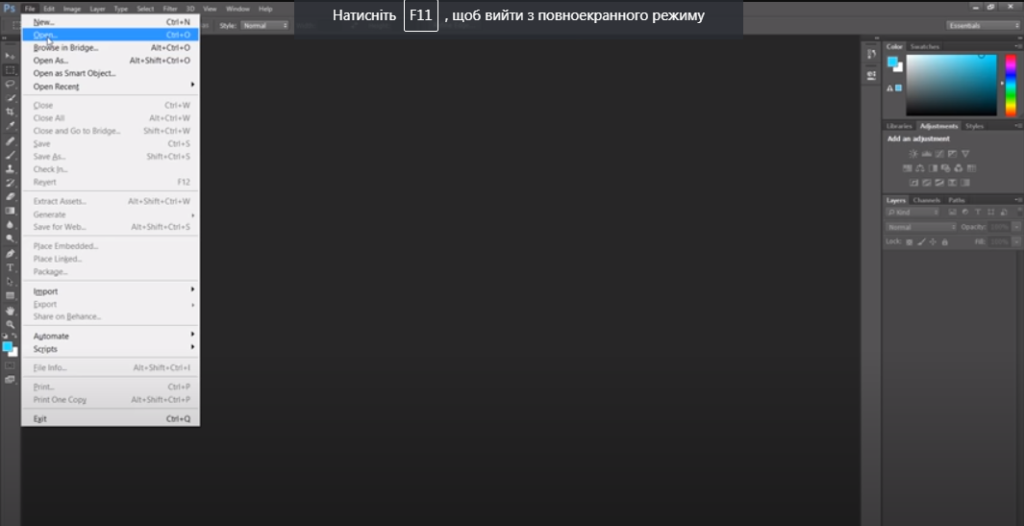
- Click the “File” menu at the top left corner of the window;
- Choose “Open” from the drop-down menu. Alternatively, use the keyboard shortcut “Ctrl+O” to open the file browser;
- In the file browser window, navigate to the location where your desired photo is stored;
- Select the photo file and click the “Open” button;
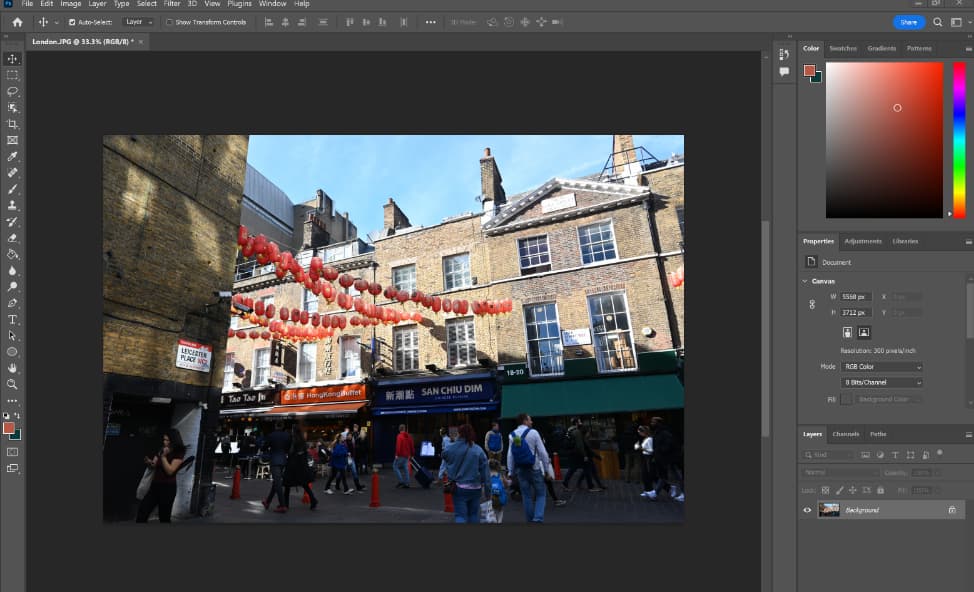
- The selected image will now open in Photoshop as a new document.
On a Mac:
- Open Ps on your Mac;
- Access the “File” menu located at the upper left corner of the window;
- Select “Open” from the drop-down menu. You can also use the keyboard shortcut “Cmd+O” to open the file browser;
- In the file browser window, navigate to the location where your desired photo is stored;
- Select the photo file and click the “Open” button;
- The selected image will now open in the program as a new document.
The steps are fairly similar between PC and Mac, with the primary difference lying in the keyboard shortcuts. While Windows utilizes “Ctrl+O,” Mac users employ “Cmd+O” to open the file browser. Apart from that, importing a single image into Photoshop remains consistent across both platforms.
Remember, once imported, you can unleash your creativity by utilizing Photoshop’s extensive editing tools, adjusting settings, applying filters, and executing various creative operations to enhance and transform your images according to your vision.
For Photoshop Mix on Mobile
Photoshop Mix, a free mobile app by Adobe, empowers you to delve into advanced photo editing on your mobile devices. Importing a single image into Ps Mix is a breeze, ensuring a smooth editing experience.
Here’s a step-by-step guide to follow:
- Launch the app on your mobile device, ensuring it’s installed and up to date from your app store;
- On the main screen, tap the “+” button to initiate a new project;
- Within the project creation screen, you’ll encounter various options. Choose “Open from device” or “Open from files” based on your device and operating system specifications;
- Your device’s file browser will materialize, enabling you to navigate to the location where the desired photo is stored;
- Select the photo file you wish to import and tap on it to open it in the app;
- Once your image is imported into the app, a plethora of editing tools and features await, enabling you to elevate your photo to new heights. Adjustments such as exposure, contrast, and saturation, alongside cropping, resizing, filter application, and blending multiple images, are at your disposal. Additionally, working with layers allows you to craft intricate compositions and apply diverse effects.
It’s important to note that Photoshop Mix is tailored specifically for mobile devices, offering a streamlined and intuitive interface in comparison to the desktop version of Ps. This user-friendly approach facilitates quick edits and creative enhancements, granting you the freedom to transform your photos directly from your mobile device.
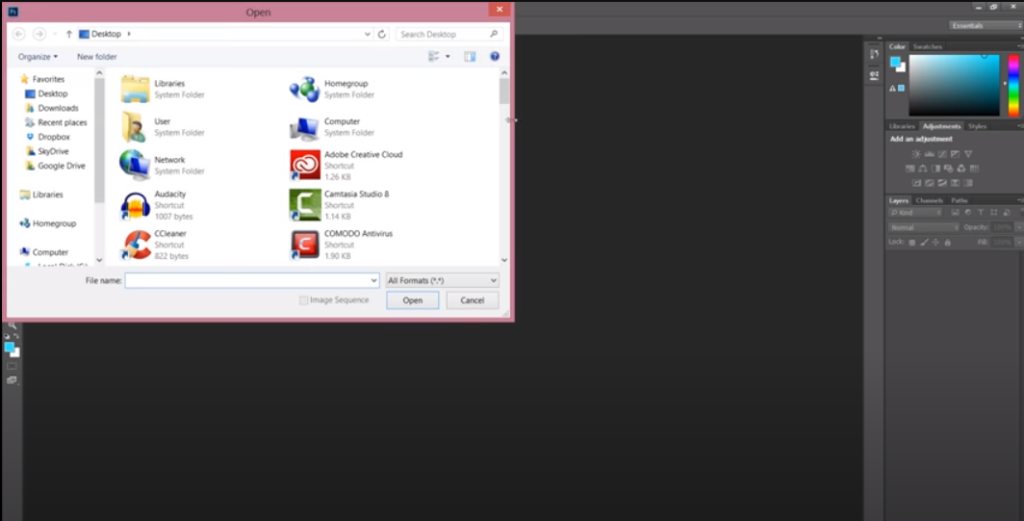
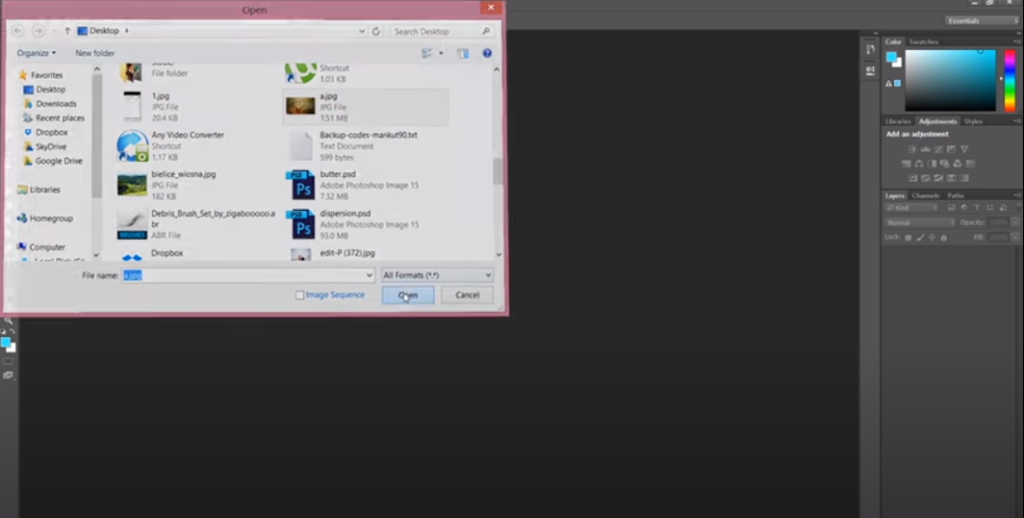
Utilizing the Open Dialog in Photoshop
Importing a photo into Photoshop through the Open Dialog grants you enhanced options for selecting and opening specific image files. Follow these steps to seamlessly import your desired photo:
- Launch Ps on your computer;
- Navigate to the “File” menu located in the upper left corner of the window;
- Click on “Open” to unveil the “Open” dialog box. Alternatively, use the keyboard shortcut “Ctrl+O” (Windows) or “Cmd+O” (Mac) to directly access the dialog box;
- Within the “Open” dialog box, explore the file location where your photo is stored. Delve into folders and drives to locate the desired picture file;
- Once you’ve found the photo, click on it to select it;
- Optional: To select multiple photos simultaneously, hold down the Ctrl key (Windows) or Cmd key (Mac) while clicking on additional photos;
- Click the “Open” button in the Open dialog box to import the selected photo(s) into the program.
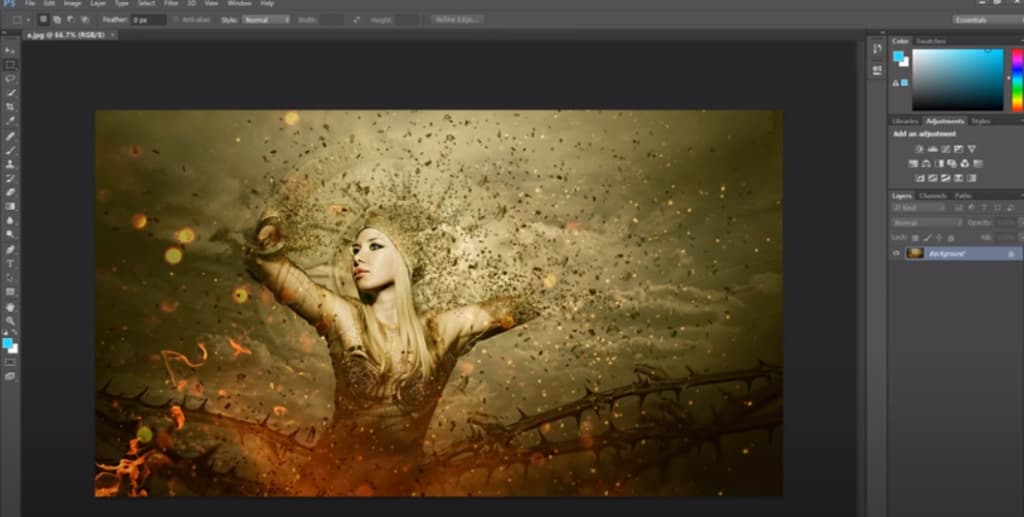
Upon importing the photo(s), they will open as a new document(s) in Ps, poised for your editing prowess.
The “Open” dialog provides an avenue to navigate your computer’s file system, preview images before opening, and selectively import specific files or multiple files into Ps. This method bestows greater flexibility and control compared to alternative approaches like drag and drop.
Remember, once a photo is imported into Photoshop, an array of editing tools, adjustments, filters, and creative manipulations await, allowing you to enhance or transform the images to perfectly align with your vision.
Adding Images through the Adobe Photoshop Welcome Screen
Importing a photo into Ps using the Adobe Photoshop Welcome Screen offers a seamless and efficient approach to initiating a new project. Follow these steps to import your photo effortlessly:
- Once you launch the program, the Adobe Photoshop Welcome screen will greet you, presenting a range of options and recent projects;
- On the screen, locate and click on the “Open” button or the “New” button, depending on your version of the image-editing program. The wording may vary, but the intent is to open an existing file or begin a new project;
- If you choose the “Open” button, a file browser window will appear. Navigate to the location where your photo is stored, select it, and click on the “Open” button to import the photo into Ps;
- Opting for the “Create” button prompts a new document settings dialog box. Here, you can customize the size, resolution, and other properties of the new document. Once configured, click the “Create” button;
- Upon completing the “Open” or “Create” step, the selected photo or newly created document will open in Ps, poised for your editing endeavors.
Utilizing the welcome screen in Ps streamlines the photo import process by providing direct access to the “Open” or “Create” options right from the start. This convenient feature enables you to swiftly open existing photos or embark on new projects within Photoshop without navigating through the main application interface.
Adding Images with Drag and Drop
Importing a photo into Photoshop through drag and drop offers a convenient and swift method to open images. Here’s how you can do it:
- Open the folder where your photo is stored on your computer;
- Arrange your desktop windows so that both the folder and Ps windows are visible.
On Windows:
- Click and hold the left mouse button on the desired photo file;
- While holding the mouse button, drag the photo file into the Ps window;
- Release the mouse button to import the photo.
On a Mac:
- Press and hold down the left mouse button or trackpad on the desired photo file;
- While holding the button, drag the photo file over the Ps icon in the Dock;
- Release the mouse or trackpad button to import the photo.
Once the photo is dragged into Ps, it will be imported and opened as a new document. From there, you can proceed to edit and manipulate the image using the various tools and features available in the program.
Keep in mind that the exact steps for drag and drop may vary slightly depending on your operating system and settings. Nevertheless, the fundamental concept remains the same: select the photo, drag it to the Ps window, and release the mouse or trackpad button to import the image.
Incorporating Images into Your Photoshop Composition
Importing an image into an existing Photoshop file opens the door to new creative possibilities. Here’s how to seamlessly integrate new content into your project:
Method #1: “Place Embedded” or “Place Linked”
- Open the Ps file you wish to import the image into;
- Access the “File” menu at the upper left corner of the window;
- Select “Place Embedded” or “Place Linked” (based on your Ps version). “Place Embedded” inserts the image directly into the file. “Place Linked” creates a dynamic link to the image, reflecting changes made externally;
- Navigate to the location where the image file is stored;
- Choose the desired image file and click “Place” or “OK”.
The imported image will manifest as a new layer within your Ps document, granting you control over its position and size.
Method #2: Drag and Drop
- Open both the Ps document and the folder containing the image file on your computer;
- Click and hold the left mouse button on the image file;
- While maintaining the button’s hold, drag the image file into the Photoshop document;
- Release the mouse button to deposit the image as a new layer within the document.
Once the image is imported, you can unleash your artistic prowess by utilizing an array of Ps tools and features. Apply adjustments, layer styles, masks, and blending modes to seamlessly integrate the imported image with your existing masterpiece.
Importing Images from Lightroom to Photoshop
To seamlessly import images from Adobe Lightroom to Photoshop, follow these steps:
- Open Adobe Lightroom on your computer;
- Select the images you want to import into Ps by Ctrl-clicking (Windows) or Cmd-clicking (Mac). You can also choose a range of images by clicking the first image, holding down the Shift key, and clicking the last image;
- With the images selected, navigate to the Photos menu at the top of the Lightroom window;
- From the drop-down menu, choose “Edit In” and then select “Adobe Photoshop” or “Open as Photoshop Layers” (the wording may vary);
- Lightroom will prompt you to select editing options for the chosen images, such as file format, color space, bit depth, resolution, and more. Customize the settings according to your preferences;
- Click the “Edit” or “Edit Photos” button to proceed;
- Lightroom will then transfer the selected images to the program for editing. If you chose “Adobe Photoshop” in step 4, each image will open in a separate Photoshop document. If you selected “Open as Photoshop Layers,” the images will be merged into a single Ps document, with each image on a distinct layer.
Once imported, utilize a range of editing tools and features to further enhance and modify the images. Upon completing the editing process, save the changes, and Lightroom will automatically reflect the updated versions.
This seamless integration between Lightroom and Photoshop streamlines your workflow, providing a powerful combination of applications for comprehensive image editing and enhancement.
Leveraging Photoshop Express to Enhance Your Images
Photoshop Express, a mobile app available for iOS and Android devices, provides a simplified yet powerful version of the program for image editing. Importing an image into Ps Express is a straightforward process.
Here’s how you can do it:
- On the Home screen, locate the “+” button or the “Add Photo” option, typically positioned at the bottom center of the screen;
- Your device’s photo library or gallery will open within the app;
- Navigate through the albums, folders, or categories based on your device’s organization to find the desired image;
- Tap on the image you wish to import, and it will load into the application for editing;
- Once the image is imported, you can leverage the wide range of editing tools and features offered by Ps Express to enhance and modify it. These tools encompass cropping, adjusting brightness, contrast, saturation, applying filters, adding text, and more. Designed with a user-friendly interface, Photoshop Express facilitates effortless navigation and edits for your images.
After completing the editing process in the app, you have the option to save the edited image to your device or share it directly on social media platforms, via email, or through other compatible applications.
Note that the app offers a more simplified feature set compared to the full version of the program. If you require advanced editing capabilities, exploring Ps on a desktop or laptop computer would be advantageous.
Streamlined Workflow: Importing Multiple Images into Photoshop
Importing multiple images enables the efficient handling of multiple files simultaneously. Here, we present various methods to import multiple images:
Method #1: File > Scripts > Load Files Into Stack
- Access the “File” menu located in the upper-left corner of the Photoshop window;
- Choose “Scripts” and then select “Load Files Into Stack”;
- In the “Load Layers” dialog box, click the “Browse” button and navigate to the folder containing your images;
- Select all desired image files by holding down Ctrl (Windows) or Cmd (Mac) and clicking each of them;
- Click the “Open” button.
Photoshop will import the selected images as separate layers in a new document.
Method #2: Drag and Drop
- Open the folder where your images are stored on your computer;
- Adjust and position the windows on your desktop, ensuring both the folder window and Photoshop application window are visible;
- Click and hold the left mouse button on the first image file you wish to import;
- While maintaining the mouse button pressed, drag the image file into the Photoshop window;
- Release the mouse button to import the image into Photoshop. Repeat this process for each image you intend to import;
- Each image will open as an individual document in Photoshop.
Method #3: Adobe Bridge
- Launch Adobe Bridge, a file management tool provided by Adobe;
- Navigate to the folder containing your images;
- Select all desired image files by holding down Ctrl (Windows) or Cmd (Mac) and clicking each of them;
- Right-click on any of the selected images and choose “Open in Camera Raw” or “Open in Photoshop” from the context menu;
- The selected images will open in Photoshop as separate documents or layers within the same document, depending on your settings.
These methods grant you the flexibility to import multiple images into the program as separate documents or layers, according to your preference. Once imported, you can leverage a wide array of Ps tools and features to edit and manipulate the images to your liking.
Efficient Time-Saving Techniques for Loading Multiple Images into Photoshop
Save time and optimize your workflow when loading multiple images into Photoshop with these effective techniques:
- Leverage Adobe Bridge: Make use of Adobe Bridge, a powerful file management tool that enables you to preview and organize images before opening them in Photoshop. Utilize Bridge’s capabilities to quickly select and arrange the images you wish to import, streamlining the process;
- Organize and Sort Image Files: To expedite the image loading process, consider sorting and organizing your files. Rename or number them in a way that reflects the desired order or location. This approach enables easy selection without the need for time-consuming file searches;
- Utilize File Browser Shortcuts: Take advantage of shortcuts provided by file browsers like Windows Explorer or Mac Finder. For instance, in Windows Explorer, you can hold the Ctrl key while clicking on multiple files to select them simultaneously. Mac Finder offers a similar function using the Command key, enabling swift file selection;
- Harness Adobe Photoshop Scripts: Explore the range of scripts to automate repetitive tasks, including loading multiple images. The “Load Files into Stack” script, accessible through File > Scripts > Load Files into Stack, allows you to select multiple image files and load them as layers in a new Ps document. This automated process saves time by efficiently loading and stacking images;
- Customize Your Workspace: Optimize your workspace by arranging panels, tools, and presets to suit your workflow. By personalizing your workspace and creating custom tool presets, you minimize the time spent searching for specific tools and options when working with multiple images. Save your customized workspace for quick access in future projects;
- Leverage Presets and Automation: If you frequently work with images requiring similar adjustments and modifications, consider creating presets or using automation tools within the program. These tools enable you to apply predefined settings to multiple images in batch mode, significantly reducing manual effort and ensuring consistency across your work.
By implementing these techniques, you can enhance your efficiency when loading multiple images into Ps, allowing you to focus more on the creative aspects of your work and spend less time on repetitive tasks.
Bottom Line
The process of importing images into Photoshop holds immense significance, as it serves as the gateway to a multitude of transformative tasks. Whether you’re editing photos, crafting captivating compositions, manipulating layers, integrating textures, collaborating with other software, or accessing existing Ps files, importing images sets the stage for unleashing your creative vision.
Renowned for its versatility and robust capabilities, the image-editing program provides an expansive environment for working with images. With its array of tools and features, this software empowers you to breathe life into your artistic ideas and turn them into visually stunning realities. By seamlessly importing images into Ps, you open up a realm of endless possibilities, enabling you to push the boundaries of your creativity.