Mastering Text Manipulation in Procreate: A Detailed Guide
Procreate is a popular digital illustration app available on iPadOS known for its impressive range of professional-level tools and capabilities. While traditionally used for freehand drawing and painting, Procreate also offers features that allow you to work with text. One such feature is the ability to curve text, which comes in handy when adding an artistic touch to your illustrations. Here’s a step-by-step guide on how to curve text in Procreate.
Setting Up Procreate for Text Manipulation
Procreate is an incredible tool for digital artists, equipped with a vast array of features to create stunning artworks. When it comes to text manipulation, including the art of curving text, Procreate offers an accessible yet powerful suite of options.
Creating a Canvas
To begin your artistic journey in Procreate, the first step is to create a canvas. The canvas serves as your workspace where you can unleash your creativity and bring your ideas to life. Here’s a detailed guide on how to create a canvas using Procreate:
| Title | Description |
|---|---|
| Open Procreate | Launch the Procreate app on your device to access the main interface. |
| Access the Gallery | Once you’re in the app, you’ll find yourself in the Gallery, where you can view your existing artworks. Look for the “+” icon located at the top right corner of the screen, and tap on it. This will initiate the process of creating a new canvas. |
| Choose a Canvas Size | Procreate provides a variety of preset canvas sizes to suit different needs. You also have the flexibility to create a custom-sized canvas. For the purpose of this tutorial, we’ll use the ‘Screen Size’ preset canvas, suitable for general digital artwork. |
| Tap on “Screen Size” Preset | After tapping the “+” icon, you’ll see a range of canvas options. Scroll through the available presets until you find the “Screen Size” option, and tap on it to select it as your canvas size. |
| Customize Canvas Settings | If you prefer a custom canvas size, tap on the “Custom Size” option instead of selecting a preset. This will allow you to specify your desired dimensions, aspect ratio, and measurement units for the canvas. |
| Set Orientation | Procreate allows you to choose between landscape and portrait orientations for your canvas. The orientation options will be visible on the canvas creation screen. Select your preferred orientation by tapping on either the landscape or portrait icon. |
| Confirm and Create | Once you have selected your canvas size and orientation, review the settings to ensure they match your requirements. If everything looks good, tap on the “Create” button to generate your canvas. |
Congratulations! You have successfully created a canvas in Procreate. Now, you can dive into the world of digital art and explore the various tools and features offered by the app to bring your artistic vision to life. Remember to save your artwork regularly to preserve your progress.
Adding Text to Your Canvas
Inserting Text
Once your canvas is ready, it’s time to add some text. To add text in Procreate:
- Tap on the wrench icon at the top left corner of the screen;
- From the drop-down menu, select the “Add” tab;
- Choose “Add Text”. A new layer with a text box will be created in the center of your canvas;
- Tap inside the text box to bring up the iPad’s keyboard and type in your desired text.
Styling Text
After typing your text in Procreate, you have the option to stylize it using a range of text editing options. Here’s a detailed guide on how to style your text in Procreate:
| Title | Description |
|---|---|
| Type Your Text | Start by entering the desired text in the text box within Procreate. This could be a quote, a title, or any text you want to incorporate into your artwork. |
| Open Font Settings | To access the font settings and begin styling your text, tap on the ‘Edit Style’ button located at the bottom of the text box. This will open a panel where you can customize various aspects of the text’s appearance. |
| Adjust Font | Within the font settings panel, you have the ability to change the font of your text. Procreate offers a wide range of fonts to choose from. Scroll through the options and select the one that best suits your project. For this tutorial, let’s use the font ‘Helvetica’. |
| Set Font Size | Next, adjust the size of your text. You can do this by entering a specific value in the font size input field or by using the slider to increase or decrease the size. For this example, let’s set the font size to 100pt. |
| Align the Text | Procreate allows you to choose the alignment of your text. You can align it to the left, center, or right of the text box. To change the alignment, simply tap on the respective alignment button within the font settings panel. |
| Adjust Line and Letter Spacing | Fine-tune the spacing between lines and letters to achieve the desired visual effect. Procreate provides options to adjust both line spacing and letter spacing. Use the respective sliders to increase or decrease the spacing as needed. |
| Additional Font Options | Procreate offers additional options to further customize your text. These include features like text color, opacity, blending modes, and more. Explore these options to enhance the overall style of your text. |
| Apply the Styling | Once you have customized all the desired settings, tap on the ‘Done’ or ‘Apply’ button to apply the styling to your text. |
By following these steps, you can easily stylize your text in Procreate and achieve the desired visual impact. Remember to experiment with different fonts, sizes, and settings to find the perfect style that complements your artwork.
Converting Text to a Shape
To curve and manipulate your text in Procreate, you need to convert it to a shape. This process allows you to have more flexibility and control over the text’s appearance. Here’s a detailed guide on how to convert your text to a shape:
- Open the Layers Panel: To access the layers panel, tap on the icon located in the top right corner of the screen. The icon resembles two squares stacked on top of each other;
- Select the Text Layer: Within the layers panel, locate the layer that contains your text. Tap on the layer to select it. You should see the layer highlighted or bordered to indicate that it is selected;
- Reveal More Options: Swipe the selected text layer to the left. This action will reveal additional options for that layer;
- Tap on ‘Convert to Shape’: Among the options that appear after swiping, look for the ‘Convert to Shape’ option. Tap on it to initiate the conversion process.
Once you have performed these steps, your text will be transformed into an editable shape. This means you can now manipulate the text in ways beyond traditional typing, scaling, and positioning. You can curve the shape, apply transformations, and apply various effects to create unique and artistic text compositions.
Curving Text in Procreate
Transform Tool
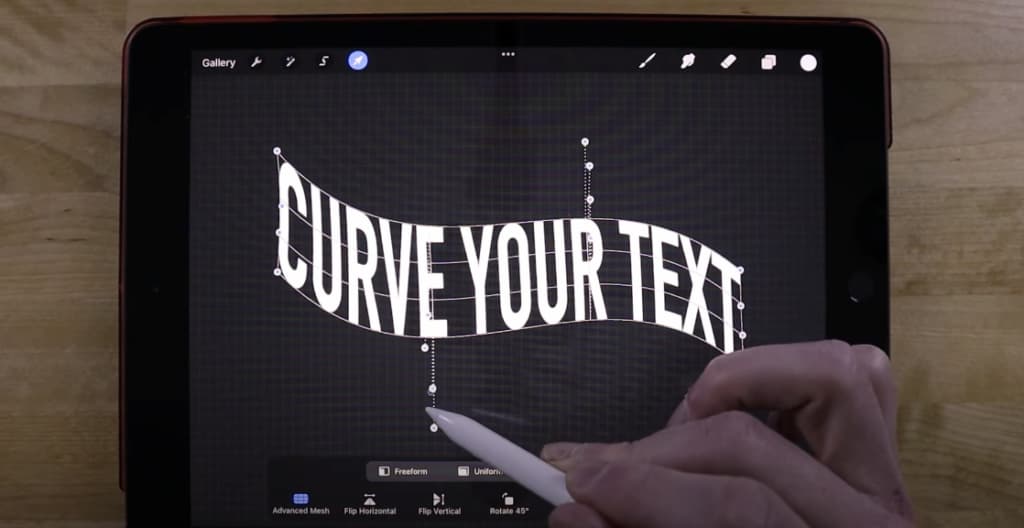
Procreate’s Transform Tool is your best friend for curving text. You’ll find the Transform Tool on the top toolbar, represented by an arrow icon. When you first tap this tool, you’ll notice it is set to ‘Freeform’ mode by default. This mode allows you to resize and move the layer. However, we need to switch to either ‘Distort’ or ‘Warp’ mode to curve our text.
Using Distort and Warp Modes
The ‘Distort’ and ‘Warp’ modes are both useful for curving text, but they serve different purposes:
- Distort Mode: This mode lets you manipulate the four corners of your text bounding box independently. To curve your text, drag the corners and edges around until you’re happy with the result. Distort mode is great for simple curving and skewing effects;
- Warp Mode: This mode offers finer control for text manipulation. In Warp mode, the bounding box is replaced by a grid overlaying your text. You can pull and push anywhere on this grid, making it possible to create complex curving effects.
Remember, creating a satisfying curve might take some time. Practice and patience are key to mastering these modes and achieving the curved text effect that fits your vision.
Finishing Touches
After curving your text, tap the ‘Transform Tool’ again to deselect and save your changes. The curved text is now part of your artwork, ready to be further integrated into your design. If you need to adjust the curve later, the Transform Tool is always there for you.
Advanced Text Manipulation Techniques
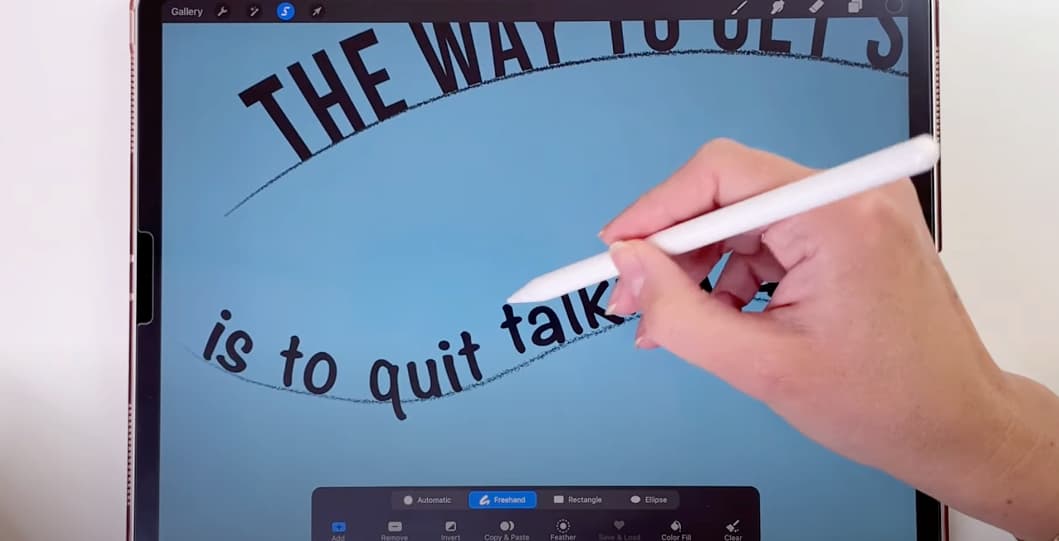
In addition to basic text manipulation, Procreate offers advanced techniques to create intricate and unique text designs. These techniques allow you to curve text along a specific shape, create circular text effects, or warp text to fit into complex forms. While these techniques require a deeper understanding of Procreate’s features and more practice, they can result in stunning text arrangements. Let’s explore an example of curving text around a specific shape:
- Draw or Import the Shape: Start by drawing or importing the shape onto your canvas. This shape will serve as the path along which you want the text to curve. You can use Procreate’s drawing tools to create the shape or import it from external sources;
- Create New Layers for Each Letter: To have more control over the placement of each letter, create a new layer for each letter of your text. This allows you to manipulate each letter individually;
- Position and Rotate Each Letter: Manually position and rotate each letter layer to follow the contours of your shape. Use Procreate’s transformation tools to adjust the position, rotation, and size of each letter to create a seamless and curved effect.
By following these steps, you can curve your text along a specific shape, creating visually captivating compositions. This advanced technique requires attention to detail and precision in manipulating the individual letters to match the shape’s contours.
While curving text around a specific shape is just one example, Procreate offers various other advanced text manipulation techniques. These include creating circular text effects, warping text to fit complex forms, and experimenting with blending modes and layer effects to achieve desired results.
Remember, mastering these techniques requires practice and experimentation. As you delve deeper into Procreate’s features, you’ll discover new ways to push the boundaries of text manipulation and create stunning designs that showcase your artistic vision.
Table: Advanced Text Manipulation Techniques
| Technique | Description |
|---|---|
| Curving Text along a Shape | Draw or import a shape onto your canvas and create new layers for each letter. Manually position and rotate each letter to follow the contours of the shape, creating a curved effect. |
| Circular Text Effect | Arrange text in a circular formation to create a circular text effect. This technique involves placing each letter along the circumference of a circle, creating a visually appealing arrangement. |
| Warping Text to Fit Complex Forms | Warp text to fit irregular or complex shapes. Use Procreate’s transformation tools to manipulate the text and adjust it to match the desired form, allowing for creative and unique text arrangements. |
| Blending Modes and Layer Effects | Experiment with different blending modes and layer effects to enhance the appearance of your text. Combine text layers with various effects and blending modes to create visually striking and captivating compositions. |
Conclusion
Procreate provides countless ways to manipulate text and add an artistic flair to your creations. As you practice and experiment, you’ll discover the true potential of this powerful tool, pushing your digital art to new horizons.
FAQS
While Procreate doesn’t have a built-in tool for curving text along a path, you can achieve this manually. Create a new layer for each letter and position them around the circular path. It may take some time, but the results can be impressive.
Absolutely. To change the color, select your text layer, choose ‘Alpha Lock’ from the Layer Options, and then use the ‘Fill Layer’ option with your chosen color.
To curve multiple lines of text at once, ensure all lines are in the same layer before converting the text to shape. This will allow you to manipulate all lines simultaneously.