The Art of Straight Lines in Procreate: An In-Depth Tutorial
Procreate, the renowned digital art application, has a plethora of tools that enable artists to create diverse and stunning artwork. One fundamental technique to master is the creation of straight lines, which, although seemingly simple, can often be a challenge for beginners. This detailed tutorial will guide you through every step, ensuring you become proficient in crafting straight lines in Procreate.
Straight Lines with QuickLine and QuickShape Features
The QuickLine and QuickShape tools are the most straightforward ways to draw straight lines in Procreate.
QuickLine Process
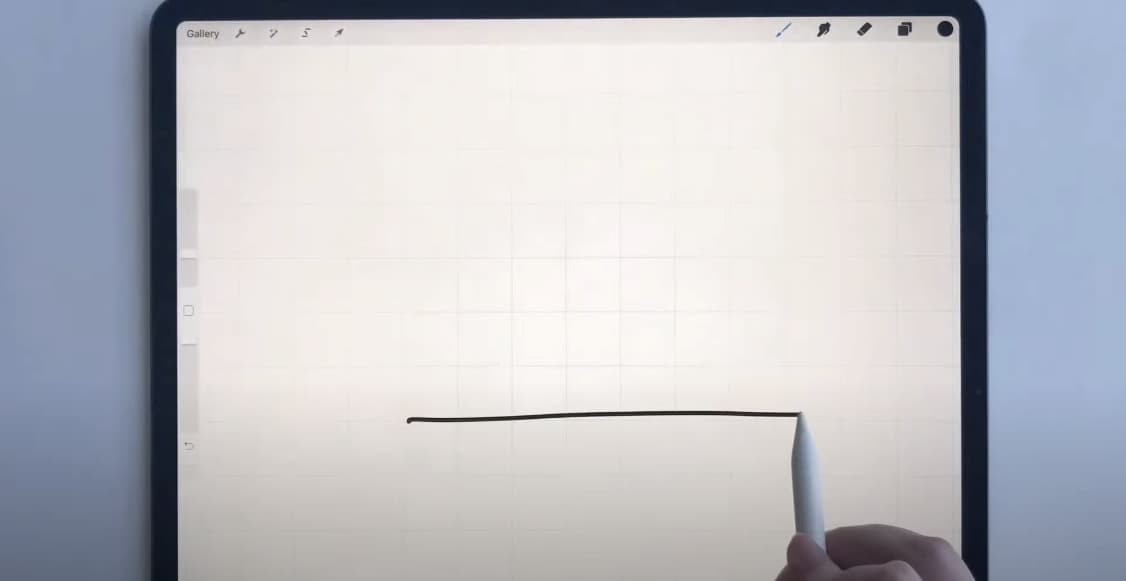
To create precise and straight lines in Procreate, you can utilize the QuickLine feature. This tool simplifies the process of drawing lines by automatically straightening them after a brief activation. Follow the steps below to use the QuickLine feature effectively:
- Select the Brush Tool: Start by accessing the top-right menu in Procreate. Within this menu, you will find various brush options to choose from. Procreate offers a wide range of brushes, each with its own unique texture and stroke style. If you are a beginner, it is recommended to begin with a basic brush like the “Studio Pen” or “Technical Pen,” which can be found in the Inking panel;
- Drawing the Line: Once you have selected your desired brush, begin drawing a line on your canvas in the direction you want it to go. It is important not to lift your stylus or finger from the screen immediately after drawing the line. Keeping contact with the screen will allow the QuickLine feature to function correctly;
- QuickLine Activation: After drawing the line, continue holding your stylus or finger on the screen for approximately one second. During this time, Procreate will automatically straighten the line you drew, aligning it perfectly.
Procreate also provides the QuickShape tool, which offers an enhanced level of functionality by allowing you to create geometric shapes and straight lines with precision and ease. This feature can be particularly useful when you require accurate shapes for your artwork. Here’s how you can utilize the QuickShape tool:
| Title | Description |
|---|---|
| Activate the QuickShape tool | To access the QuickShape tool, make sure you have the Brush Tool selected. Then, draw a line or shape as you normally would. Procreate will recognize your intent to create a geometric shape or a straight line and automatically activate the QuickShape feature. |
| Modify the Shape | Once the QuickShape feature is active, you can modify the shape or line by adjusting various parameters. For example, you can change the size, position, or angle of the shape by utilizing the control points or sliders provided by Procreate. |
| Customize the Shape | Additionally, Procreate allows you to customize the shape further by selecting from a range of predefined shapes, such as rectangles, triangles, circles, and more. You can also adjust the appearance of the shape by applying different strokes, textures, or colors. |
Utilizing the QuickLine and QuickShape tools in Procreate can significantly enhance your workflow and help you achieve precise and professional-looking artwork. Experiment with these features to explore their full potential and unlock new creative possibilities in your digital art process.
QuickShape Process
Creating precise and accurate geometric shapes and straight lines in Procreate is made easier with the QuickShape feature. This tool allows you to draw lines and shapes with precision and provides options for editing and customization. Follow the detailed steps below to utilize the QuickShape process effectively:
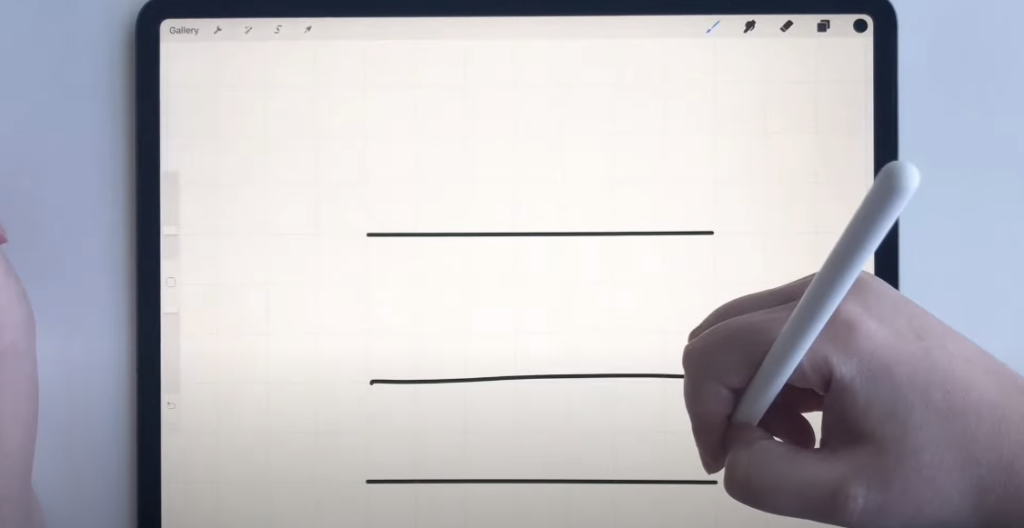
- Drawing the Line: To begin, draw a line on your canvas just as you would when using the QuickLine feature. Hold your stylus or finger on the screen without lifting it immediately after drawing the line;
- QuickShape Activation: While still keeping your stylus or finger on the screen, place another finger anywhere on the screen. By doing so, the line you drew will automatically snap to angles at multiples of 15 degrees (0, 15, 30, etc.). This activation also brings up additional information, such as the length of the line, making it easier for you to work with;
- Editing the Line: Once you have created a line using QuickShape, you can make further adjustments to refine its length and direction. Procreate provides blue handles at each end of the line, allowing you to modify the length and adjust the line’s direction as needed. Additionally, you can use the green handle to alter the curve of the line, giving you more control over its shape.
The QuickShape process in Procreate involves drawing a line while holding your stylus or finger on the screen, activating QuickShape by placing another finger, and then editing the line using the available handles. This process enables you to create precise geometric shapes and straight lines quickly and easily, enhancing your digital artwork.
Enhancing Precision with Guides
Drawing straight lines freehand can be challenging, even with the QuickLine and QuickShape features. That’s where Drawing Guides come in, assisting in the creation of perfectly straight lines and geometrical shapes.
Process to Enable Drawing Guides
To enable Drawing Guides, follow the steps below:
| Title | Description |
|---|---|
| Activate Drawing Guides | Start by tapping on the Actions icon (resembling a wrench) located in the top-left corner of the interface. This will open a menu of options. |
| Select “Canvas” Option | From the drop-down menu, locate and select the “Canvas” option. This will bring up additional settings related to the canvas. |
| Toggle on “Drawing Guides” | Within the Canvas settings, you will find the option to enable Drawing Guides. Toggle the switch to the “on” position to activate the feature. |
| Choose Guide Type | Once you have enabled Drawing Guides, you can select the type of guide that suits your needs. There are different guide types available, such as “2D Grid” and “Isometric” guides. |
| Adjust Grid Size | If you wish to modify the size and color of the grid, tap on the “Edit Drawing Guide” option. This will allow you to make adjustments according to your preferences and the requirements of your project. |
| Start Drawing | Now that you have set up the Drawing Guides, you can begin drawing straight lines using the guides as references. The guides will be visible on your canvas, providing you with a visual aid to maintain straight lines, especially over longer distances. |
The Art of Layering for Straight Lines
The Layer feature in Procreate is a powerful tool, allowing artists to work on separate elements of a piece independently.
Using Layers to Create Straight Lines
To create straight lines using layers in the drawing application, follow the detailed steps below:
- Create a New Layer: In the top-right corner of the interface, locate and tap the Layer button. This button typically resembles two overlapping squares. Select the “+” option to add a new layer to your artwork. By working on a separate layer, you can ensure that your line won’t interfere with your existing artwork;
- Draw the Line: On the newly created layer, use the QuickLine feature to draw a straight line. This feature helps you achieve precise and straight lines effortlessly. Utilizing a separate layer allows you to maintain control over individual elements of your artwork;
- Activate the Transform Tool: Once you have drawn the line, locate and tap the Transform Tool. This tool is usually represented by an arrow and can be found in the top-left corner of the interface. The Transform Tool enables you to manipulate the line without affecting the rest of your artwork;
- Adjust the Line: With the Transform Tool activated, you can now make adjustments to your line. Use the blue handles that appear around the line to stretch, shrink, rotate, or even mirror it. This flexibility allows you to fine-tune the line to your desired placement and orientation;
- Merge Layers: After you are satisfied with the placement and size of your line, you have the option to merge the layers. Tap on the Layer button once again, and then pinch the two layers together to combine them. Merging layers simplifies your artwork and ensures that the line remains integrated with the rest of your drawing.
Customizing Brushes for Straight Lines
Procreate, a versatile digital art application, provides artists with a wide range of customizable brushes. These brushes allow you to create stunning artwork with precision and control. When it comes to drawing straight lines, customizing brushes in Procreate can greatly enhance your ability to achieve accurate and visually appealing results. By adjusting settings such as shape, size, opacity, and hardness, you can tailor your brushes specifically for drawing straight lines. In this article, we will explore the process of customizing brushes in Procreate to optimize your line drawing experience.
Here are some key settings you can modify to create brushes tailored for straight lines:
- Shape: The shape of a brush determines the overall appearance and stroke style. You can choose from a variety of shapes, such as round, square, or tapered, to suit your specific needs for straight lines;
- Size: The size of a brush refers to the thickness or width of the stroke it produces. Adjusting the size allows you to create thin, delicate lines or bold, substantial lines based on your artistic vision;
- Opacity: Opacity determines the transparency or visibility of the brush stroke. By adjusting the opacity, you can create subtle or solid lines, depending on the desired effect;
- Hardness: The hardness setting controls the edge quality of the brush stroke. A hard brush creates crisp and well-defined lines, while a soft brush produces more blurred or feathered edges.
Customizing Brushes for Straight Lines
Now that you understand the basic brush settings, let’s explore how you can customize brushes specifically for drawing straight lines in Procreate. Follow the steps below to optimize your brush settings:
| Title | Description |
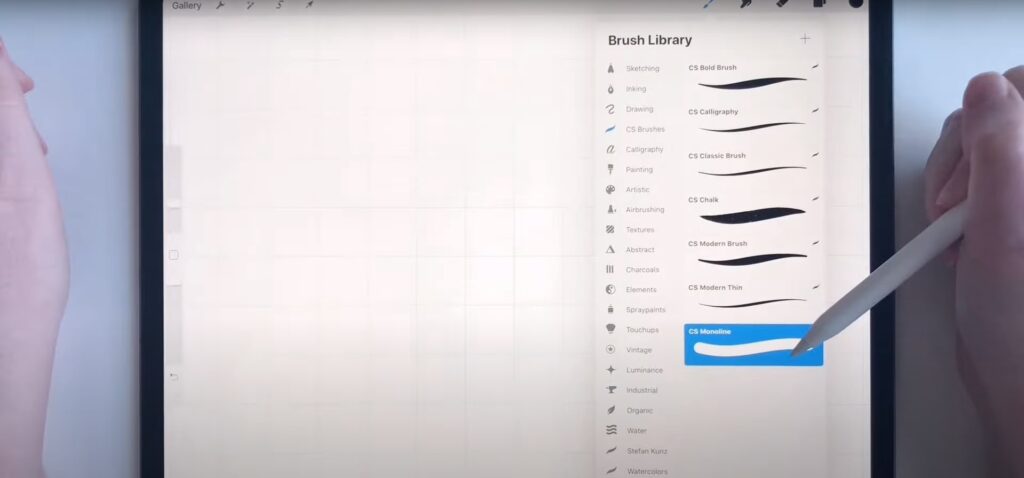
| Select a Brush | Start by choosing a brush that suits your preferences and artistic style. Procreate offers a vast selection of default brushes, including basic pens, inking brushes, and technical pens, which are ideal for straight line work. |
| Access Brush Settings | Once you’ve selected a brush, tap on the brush icon in the top menu to access the brush settings panel. Here, you will find a wide array of options to fine-tune the brush according to your needs. |
| Adjust Shape and Size | Modify the shape and size settings to create a brush that is well-suited for straight lines. Experiment with different brush shapes and sizes to find the optimal combination that provides the desired line thickness and style. |
| Control Opacity and Hardness | Depending on the effect you want to achieve, adjust the opacity and hardness settings of the brush. Higher opacity settings will result in more solid lines, while lower opacity settings can create more transparent or subtle lines. Similarly, increasing the hardness will produce well-defined edges, whereas reducing hardness will result in softer edges. |
| Save Your Custom Brush | Once you have fine-tuned the brush settings to your satisfaction, you can save it as a custom brush for future use. To do this, tap on the “+” icon in the top-right corner of the brush settings panel and select “Add Brush.” Give your custom brush a name, and it will be added to your brush library for easy access. |
Conclusion
Mastering the art of straight lines in Procreate is essential for artists looking to create precise and professional digital artwork. By utilizing tools like QuickLine and QuickShape, artists can easily draw straight lines and geometric shapes with accuracy. Drawing Guides provide further assistance in maintaining straight lines and shapes, while the Layer feature allows for independent manipulation and adjustment of lines. Additionally, Procreate offers the flexibility to customize brushes and create dotted or dashed lines. With these techniques and features, artists can elevate their artwork and achieve impressive results in Procreate.
FAQS
Yes, you can. In the “Brush” panel, there’s a “Glaze” brush under “Airbrushing,” which can be used for this purpose. Also, you can customize your own brushes to create dotted or dashed lines.
Yes, there’s no limit to the length of lines you can draw in Procreate. However, the clarity of a long line may depend on the canvas size and resolution.
Yes, you can. Use the Alpha Lock feature on the layer containing your line, then select a new color and fill the layer with it.
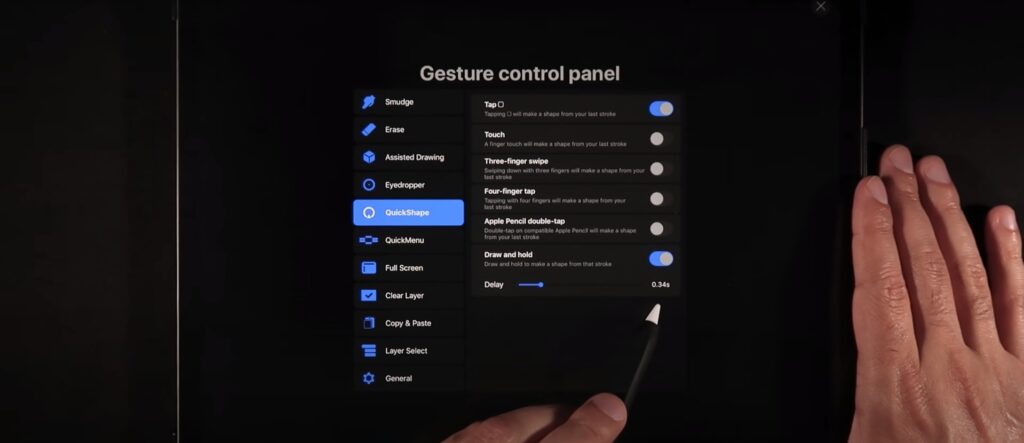
If you’re having trouble with these features, check your Gestures settings under the Actions menu to ensure they’re enabled.